Understanding your website’s performance is essential for growth. Google Analytics provides powerful insights into visitor behavior, traffic sources, and site performance. As the world’s leading analytics solution, learning how to add Google Analytics to WordPress is simpler than you think.

This guide covers multiple installation methods, ranging from beginner-friendly plugins to advanced implementations, ensuring you have functional analytics that track your site’s success.
Table of Contents
- How to Add Google Analytics to WordPress Using Plugins
- How to Install Google Analytics in WordPress Manually
- How to Add Google Analytics Using Google Tag Manager
- Why Use Google Analytics on Your WordPress Site?
- Complete Your Analytics Setup with WPZOOM
How to Add Google Analytics to WordPress Using Plugins
Using plugins is the most straightforward way to connect Google Analytics to your WordPress site. These solutions require no technical knowledge and handle all the complex setup automatically. We’ll start with Site Kit by Google, the official WordPress plugin.
Install and Set Up Site Kit Plugin
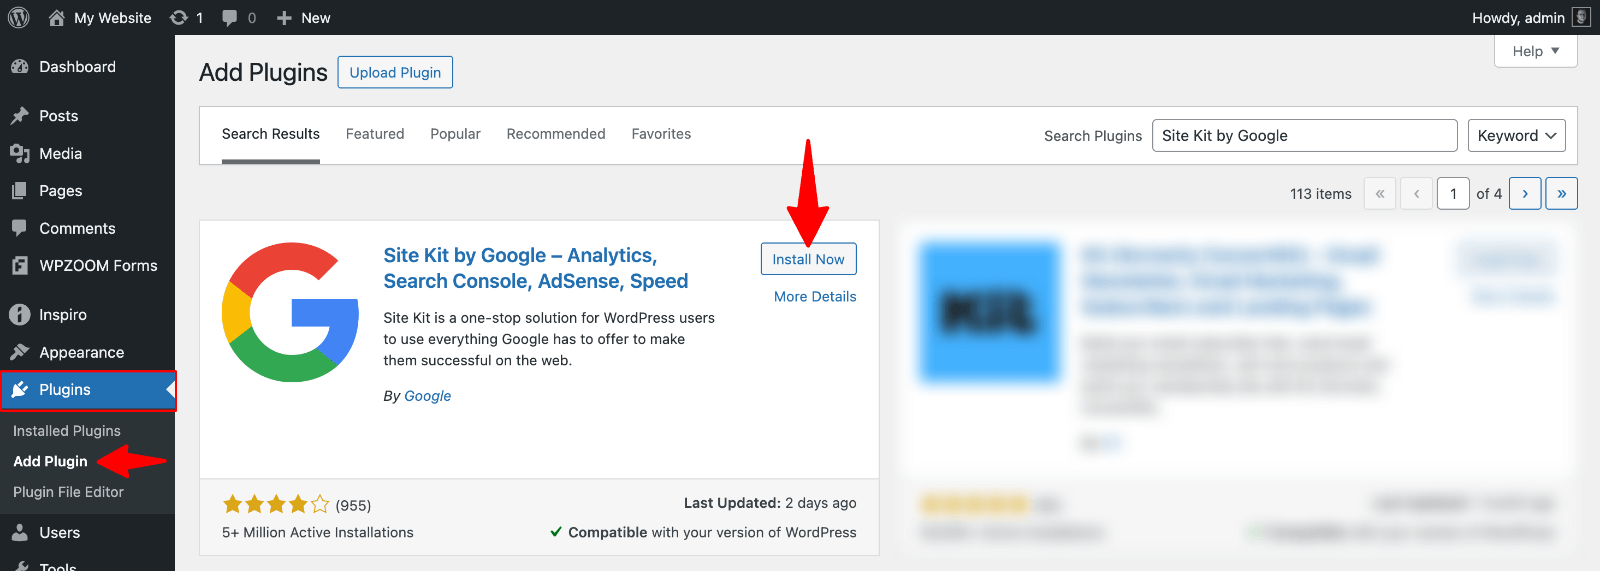
1. From your WordPress admin dashboard, go to Plugins > Add New.
2. Search for “Site Kit by Google“, click “Install Now”, and then “Activate”.
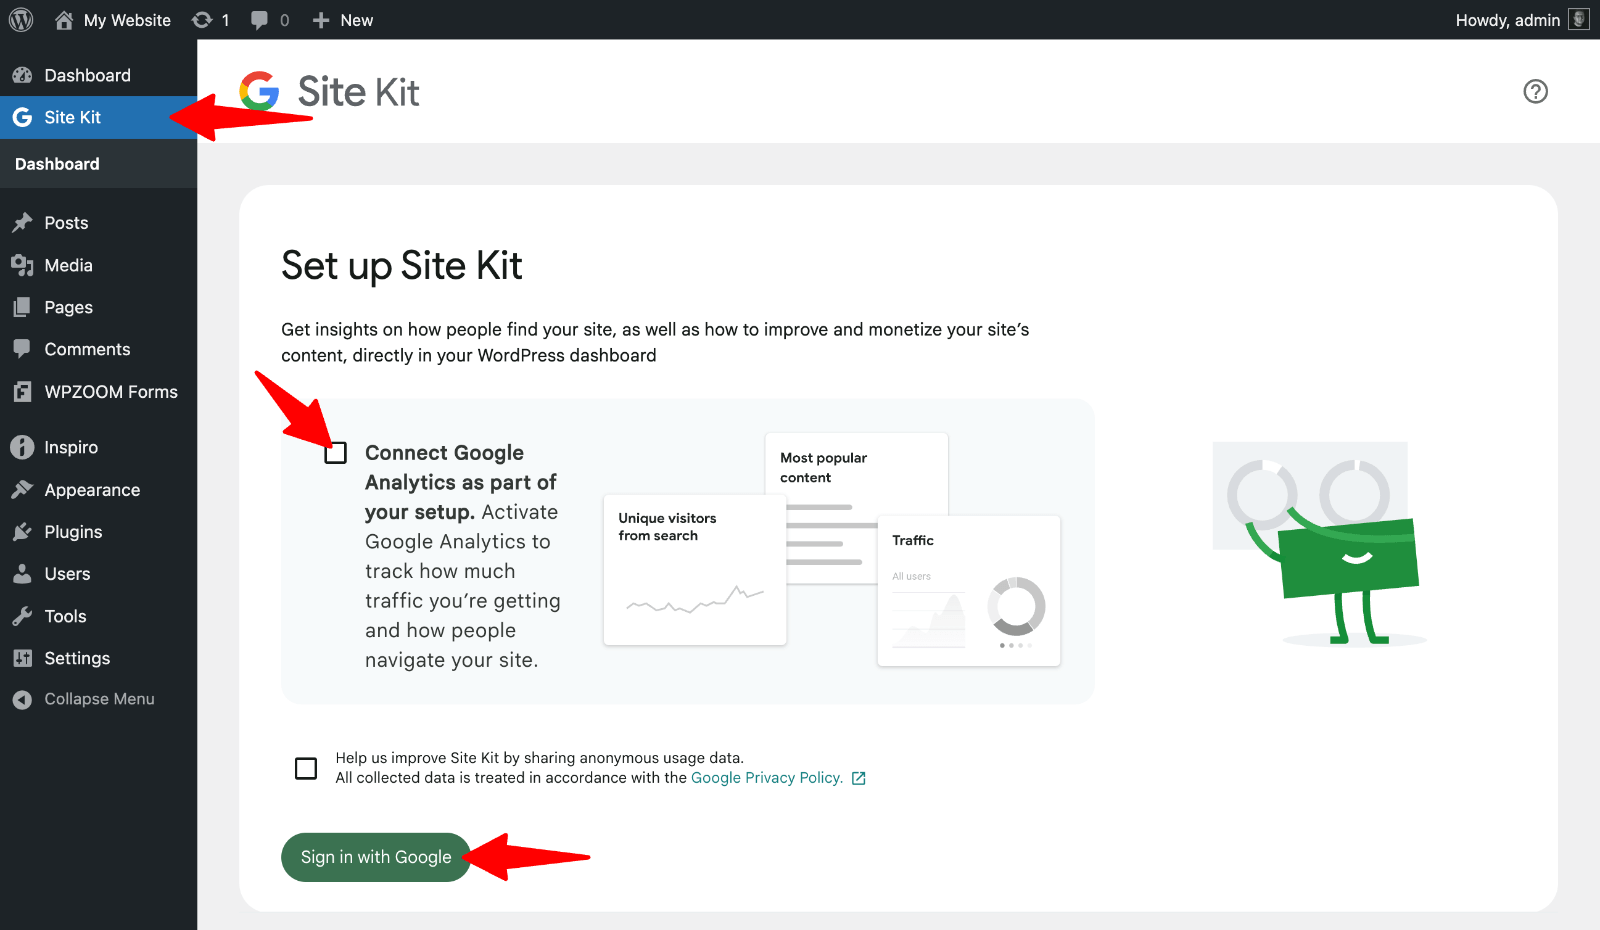
3. Click on Site Kit in your WordPress admin menu.
4. Tick the “Connect Google Analytics as part of your setup” checkbox and Click Sign in with Google to begin the configuration process.
5. Connect to your Google account by signing in with your Google credentials.
6. Verify website ownership by following the prompts (Site Kit handles this automatically).

7. Grant necessary permissions to Site Kit to access your Google services. The plugin will request permissions to access Google Analytics, Search Console, and other Google services. These permissions are essential for the plugin to function properly.
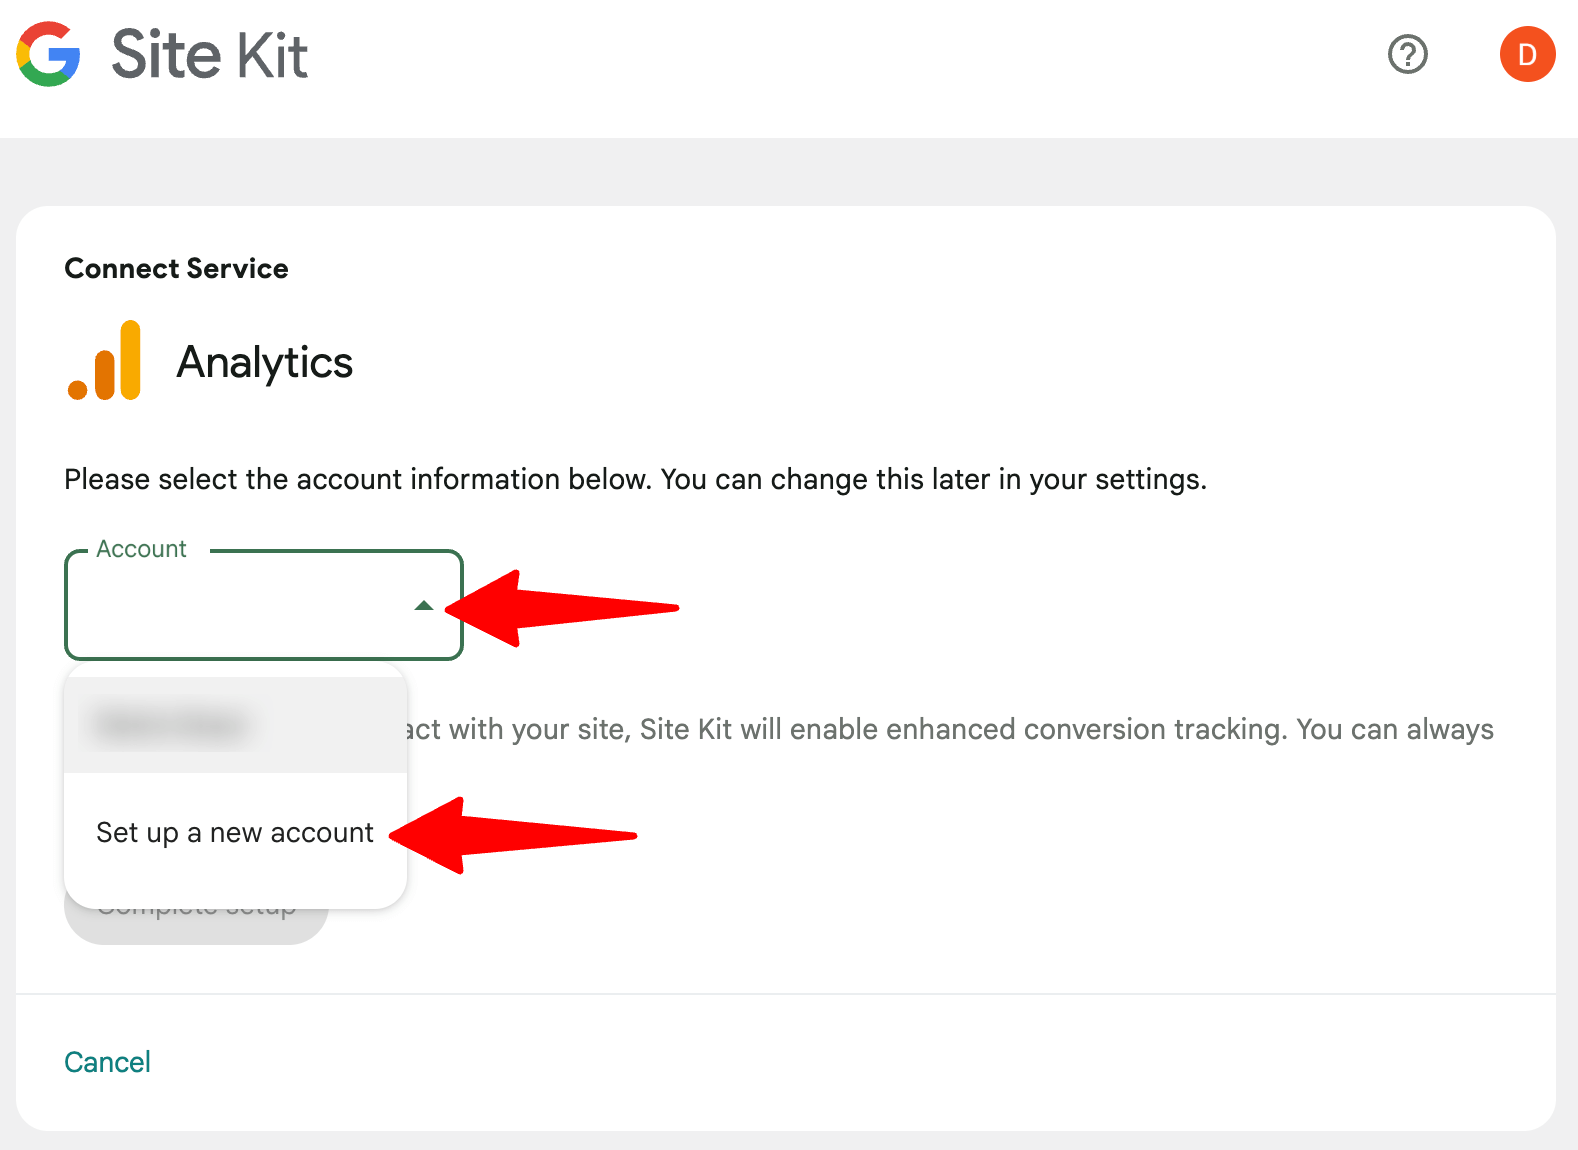
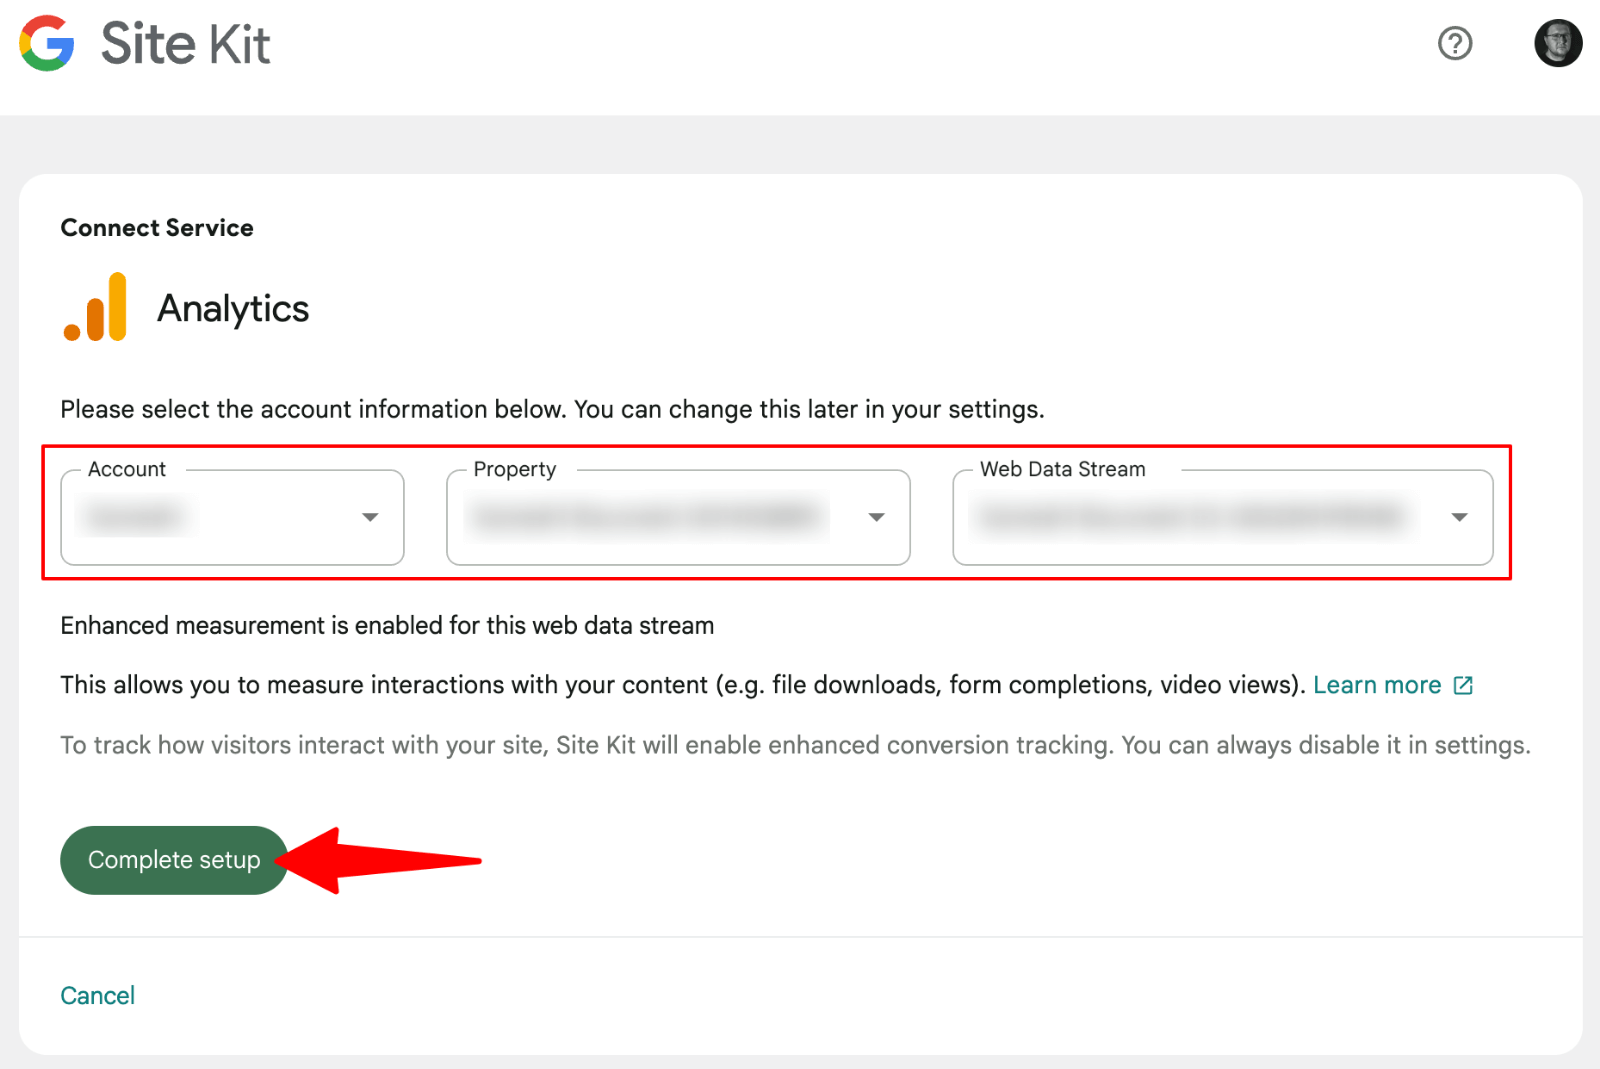
8. Select the correct Google Analytics 4 (GA4) account from the Account drop-down menu or click “Set up a new account” if you don’t have one (Site Kit will help you set it up).
9. Select the property and web data stream for your website and click Complete setup.
Verify Google Analytics is Working
It’s essential to confirm that your analytics tracking is working correctly:
- Check real-time reports in Google Analytics by visiting your website and verifying if your visit is reflected in the real-time data.
- Use Google Tag Assistant (a free Chrome extension) to verify that the tracking code is firing correctly.
- View the Site Kit dashboard in WordPress, which should start displaying basic analytics data within 24 to 48 hours.
Alternative Plugins to Set Up Google Analytics on WordPress
While Site Kit is the official Google solution, several other excellent plugins can help you add Google Analytics to WordPress:
- MonsterInsights is one of the most popular WordPress analytics plugins, offering detailed reports directly in your WordPress dashboard. It’s beneficial for beginners who want to see their analytics data without leaving WordPress.
- GA Google Analytics is a lightweight plugin that provides simple Google Analytics integration without extra features. It focuses specifically on analytics implementation, making it ideal for users who want a straightforward solution without additional dashboard widgets or reports.
- Analytify provides real-time analytics and beautiful, easy-to-understand reports. It offers both free and premium versions with advanced features like custom dashboards and enhanced eCommerce tracking.
Upgrade Your Website with a Premium WordPress Theme
Find a theme that you love and get a 10% discount at checkout with the FLASH10 code
Choose your theme
How to Install Google Analytics in WordPress Manually
To get started, you must have a Google Analytics account set up. Already have an account? Jump straight to the WordPress integration steps.
Creating a Google Analytics Account
Setting up your account is completely free and only takes a few minutes. Google will guide you through the process of creating your first property, which represents your website in the analytics system.
1. Visit analytics.google.com and sign in with your Google account.
2. Click “Start measuring” to begin setup.
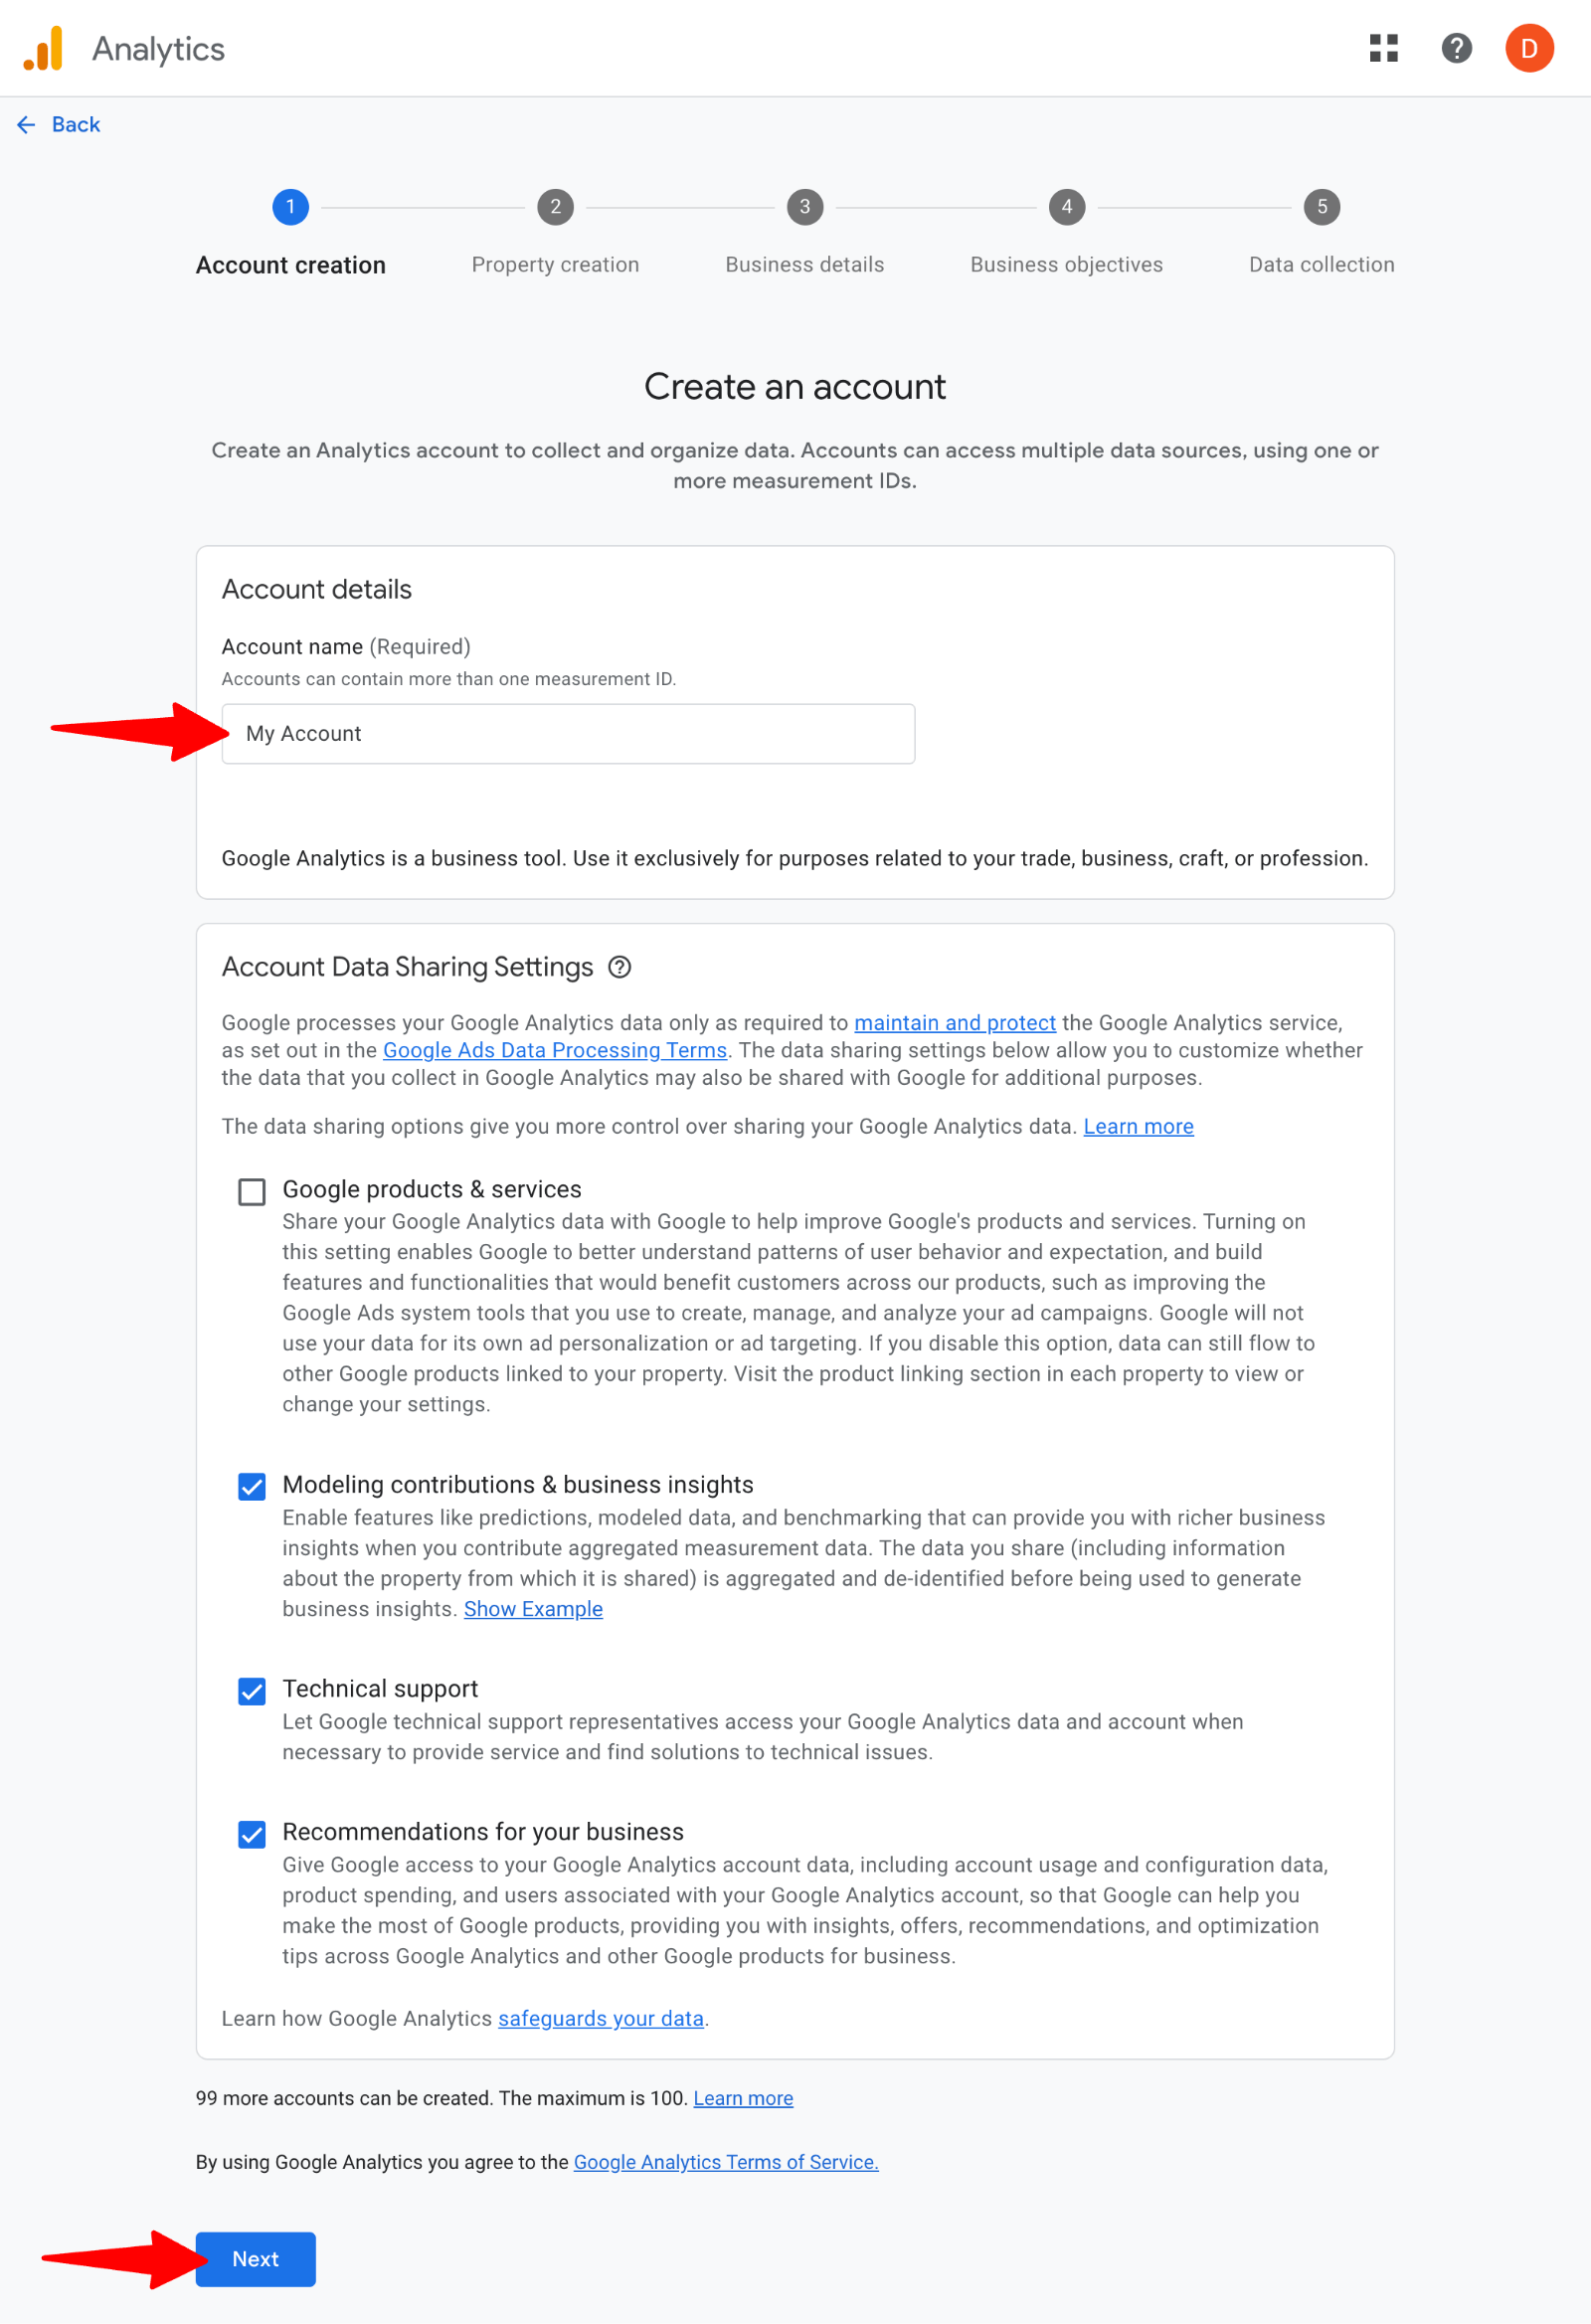
3. Enter your account name (typically your business or website name), choose your data sharing settings and click “Next“.
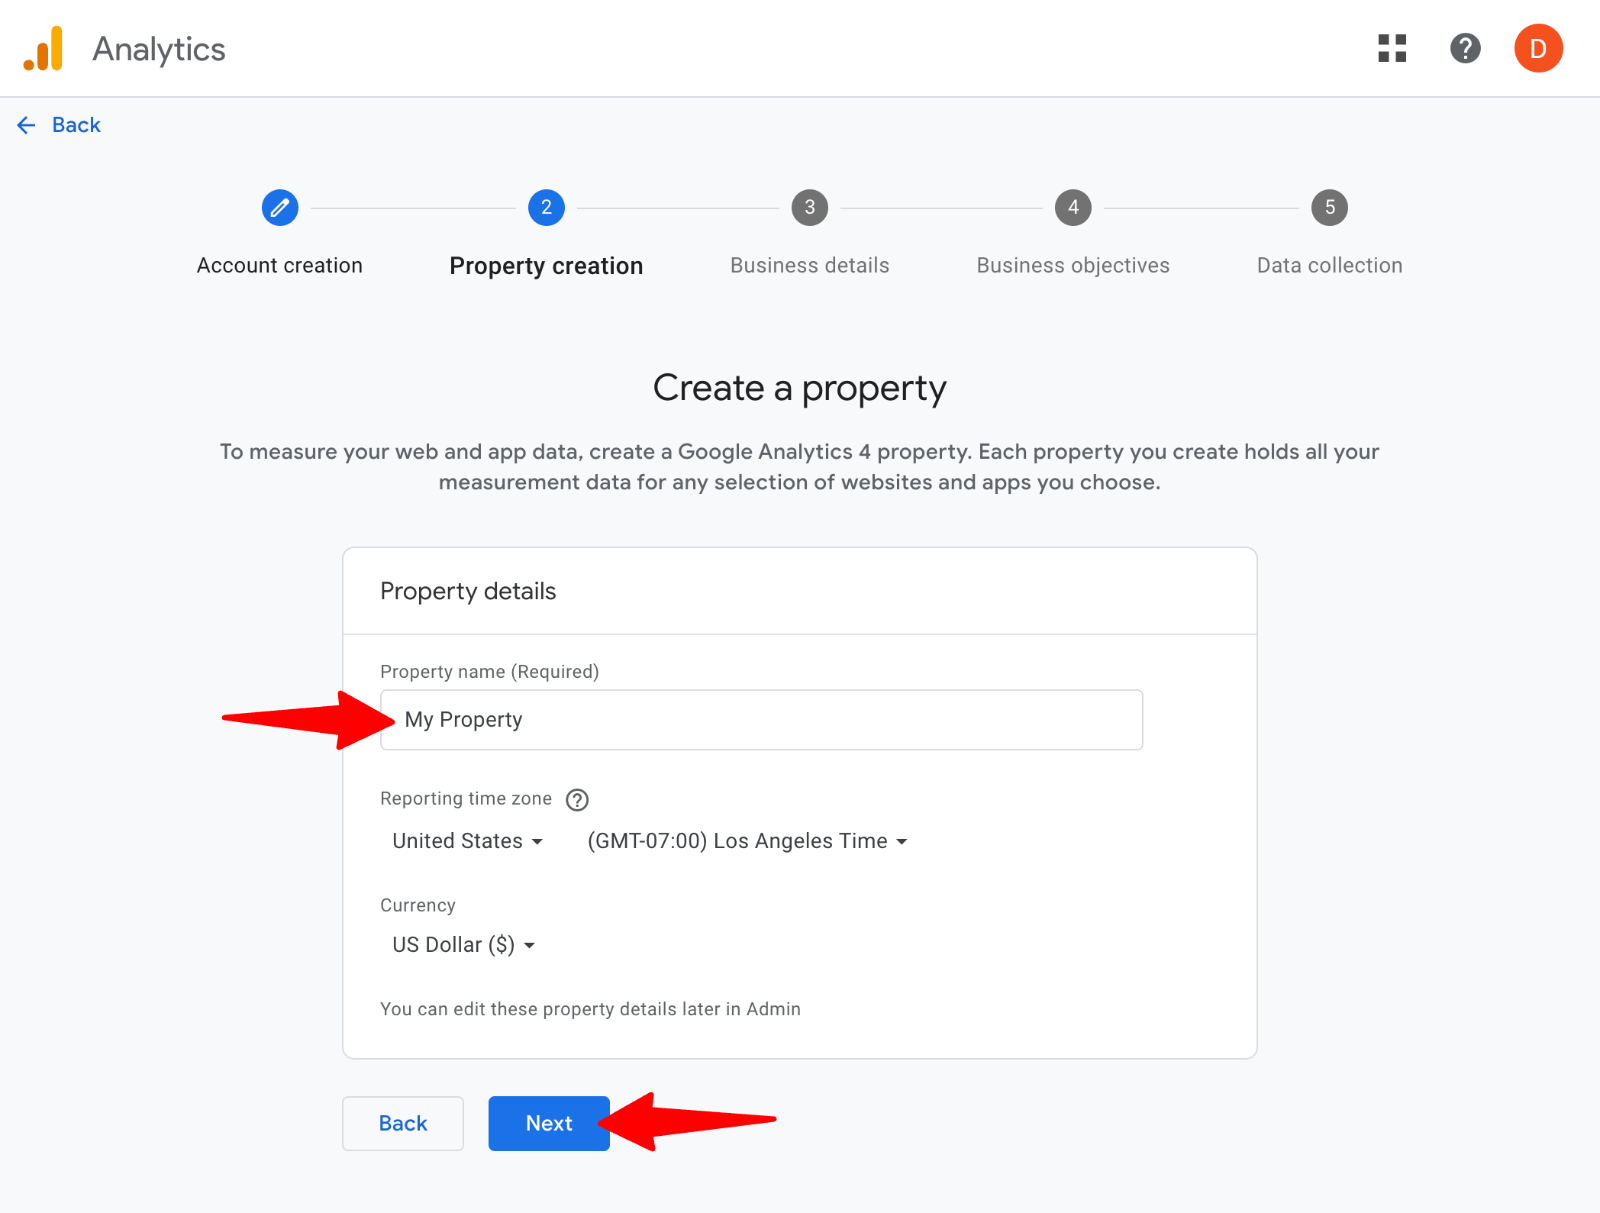
4. Enter the property name for your website and click “Next“.
5. Complete the information about your business and accept the terms and conditions.
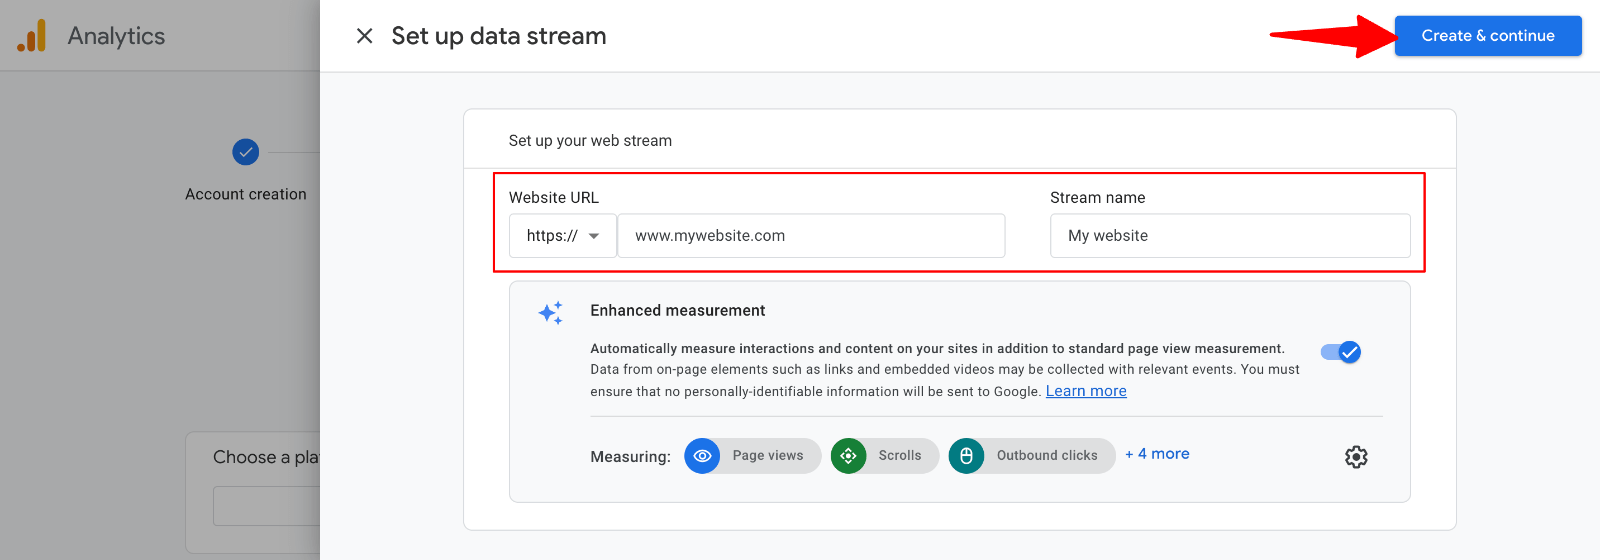
6. Choose “Web” as your platform.

7. Add your website URL and a stream name and cliock “Create & continue“.
8. Google Analytics will provide you with a unique Tracking ID and a snippet of JavaScript code known as the tracking code. You will integrate this code into your WordPress site to start collecting data.

Note your Tracking ID and keep the tracking code snippet accessible for the next steps of the integration process. This information will be crucial.
Get Your Google Analytics Tracking Code
Before you can add the tracking code to WordPress, you’ll need to retrieve it from your Google Analytics account:
1. Log in to your Google Analytics account.
2. Navigate to Admin > Data Streams.
3. Select your website’s data stream and click on it to open the details.
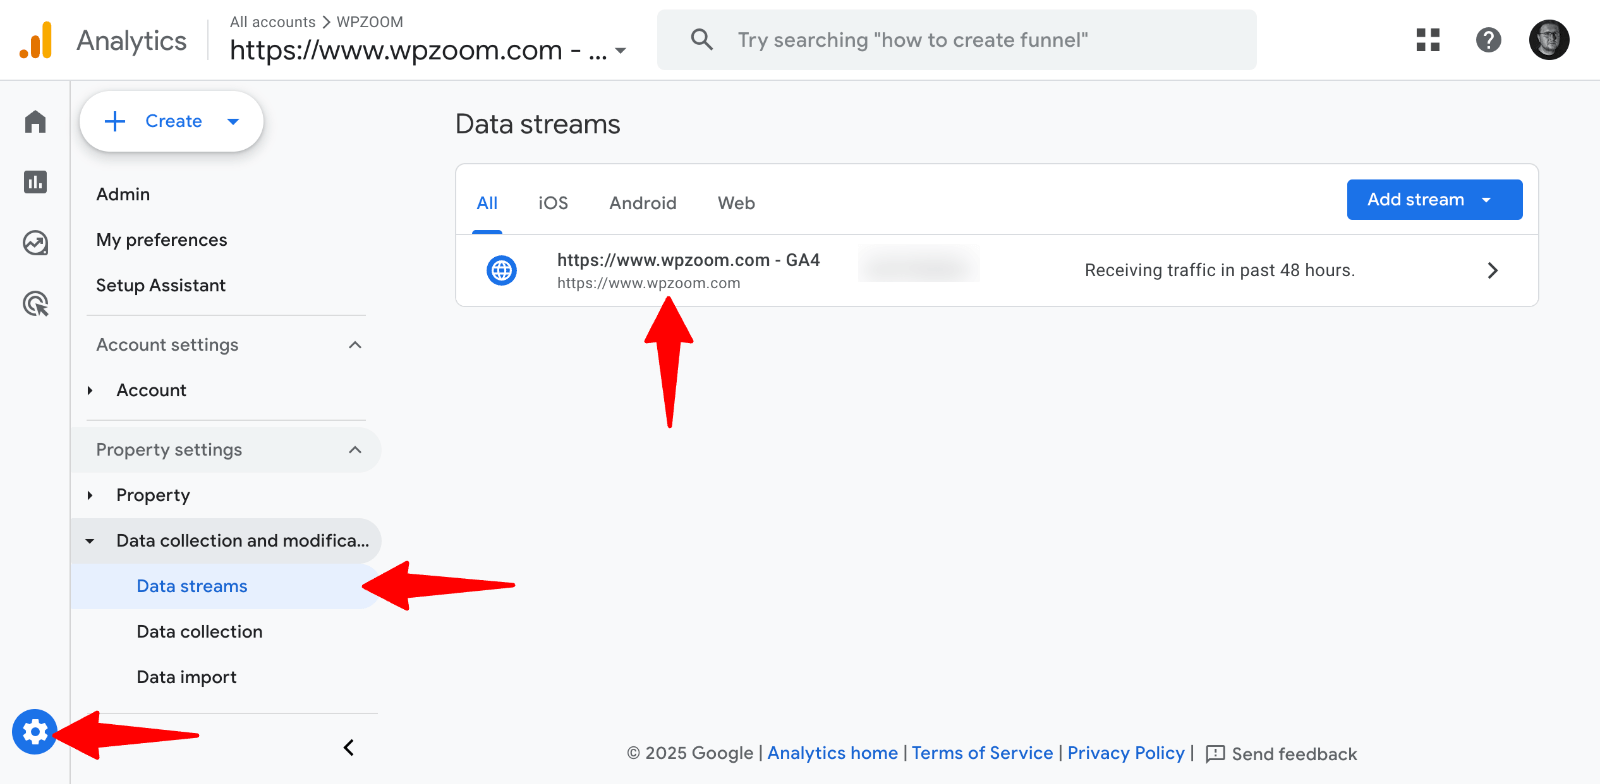
5. Scroll down to find the “Google tag” section and click “View tag instructions”.

7. Select “Install manually”.

8. Copy the complete tracking code provided (it will include your specific Measurement ID).
The code will look similar to this (but with your actual Measurement ID):
<!-- Google tag (gtag.js) -->
<script async src="https://www.googletagmanager.com/gtag/js?id=G-XXXXXXXXXX"></script>
<script>
  window.dataLayer = window.dataLayer || [];
  function gtag(){dataLayer.push(arguments);}
  gtag('js', new Date());
  gtag('config', 'G-XXXXXXXXXX');
</script>
Upgrade Your Website with a Premium WordPress Theme
Find a theme that you love and get a 10% discount at checkout with the FLASH10 code
Choose your theme
Install WPCode Plugin and Add Tracking Code
For users who prefer more control over their tracking code placement, the WPCode plugin provides a clean way to manually add Google Analytics without editing theme files.
Now you’ll install the WPCode plugin and add your tracking code:
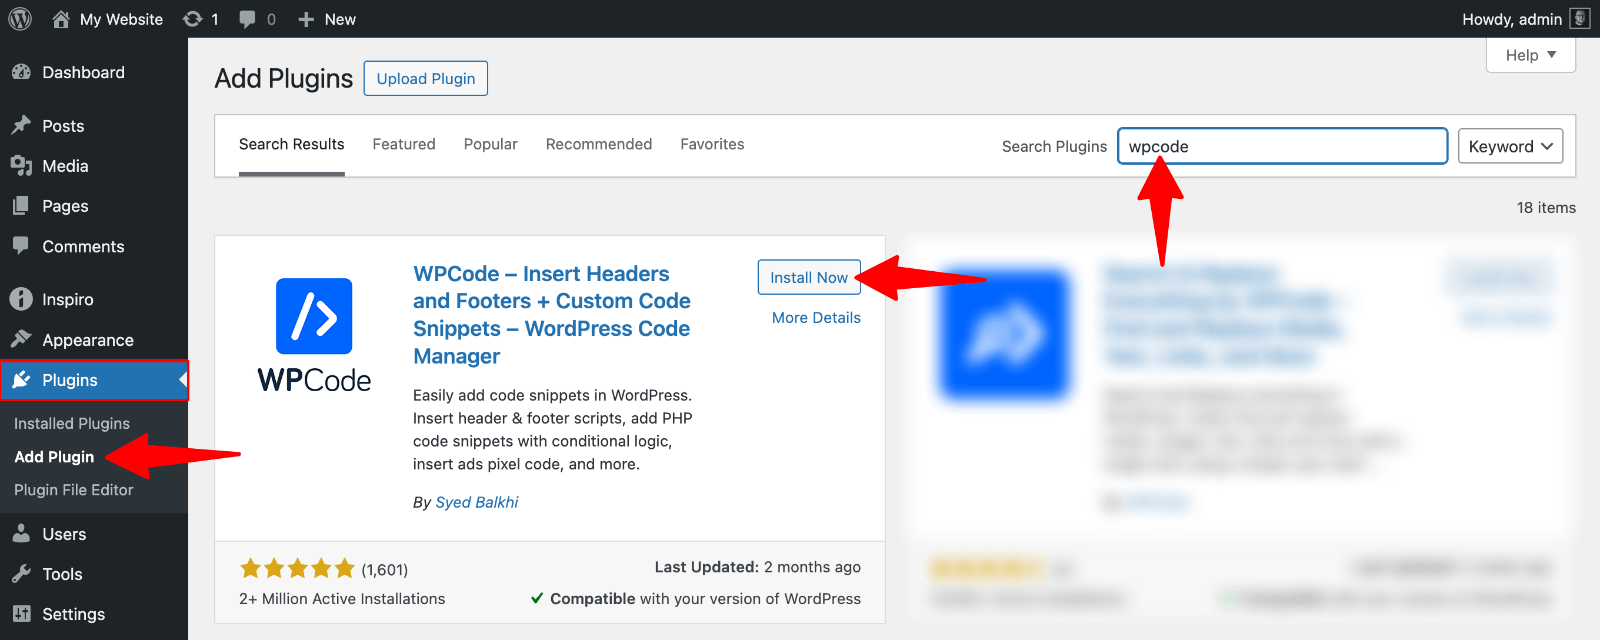
1. Go to Plugins > Add New in your WordPress dashboard.
2. Search for “WPCode“, install, and activate the plugin.
3. Go to Code Snippets > Header & Footer.
4. Paste the complete Google Analytics tracking code into the “Scripts in Header” section.
5. Click “Save Changes“.

Check your real-time analytics and use Google Tag Assistant to confirm everything is working properly.
How to Add Google Analytics Using Google Tag Manager
Google Tag Manager (GTM) is a more advanced solution that enables you to manage multiple tracking codes from a single interface.
- Create a Google Tag Manager account at tagmanager.google.com.
- Set up a new container for your website.
- Install the GTM container code on your WordPress site using WPCode or a similar plugin.
- Add your Google Analytics tag within GTM.
- Publish your container to make the changes live.
This method provides greater flexibility and is particularly useful for advanced users who want to track custom events, conversions, or multiple analytics platforms.
Why Use Google Analytics on Your WordPress Site?
Google Analytics provides crucial insights that can help you grow your website and improve user experience.
Key Benefits for Website Growth
Understanding your audience enables you to create more effective content and enhance your site’s performance. Google Analytics reveals:
- Which pages are most popular
- How long do visitors stay on your site
- Where does your traffic come from
- What devices do your visitors use
Essential Metrics Google Analytics Tracks
- Page views and unique visitors
- Bounce rate and session duration
- Traffic sources (organic search, social media, direct visits)
- User demographics and interests
- Conversion rates and goals
- Real-time visitor activity
Benefits to Website Performance and User Experience (UX)
Analytics data helps you:
- Identify and fix high-bounce-rate pages
- Optimize your most popular content
- Understand user navigation patterns
- Improve mobile experience based on device data
- Make data-driven decisions about content and design
Complete Your Analytics Setup with WPZOOM
Successful analytics implementation requires a solid foundation—your WordPress theme.
WPZOOM themes are specifically optimized for Google Analytics integration, ensuring clean code structure and fast loading speeds that improve data accuracy. Our professionally designed themes work seamlessly with all analytics methods covered in this guide, eliminating compatibility issues while delivering exceptional performance.
Maximize your analytics potential with themes built for success.